
Finishing Cedar Tongue and Groove
So you are trying to figure out how to finish your cedar tongue and groove, but you don’t know where to start or even what you want your cedar to look like.
Lucky for you, this post will show you a few options for stains and help you take a deeper look into how to finish your cedar boards! We set out to test different finishes for the cedar and to find stains that would darken the color, highlight the grain, and seal the wood.
So without further ado, let’s jump right in!
Before Project Considerations:
Cedar tongue and groove is a beautiful product that can used for many different things. We have used this cedar for two of our own projects: a porch ceiling and shutters.
Before we finished the wood on these projects, we set out to test which of the stains would work best to give us the look we wanted. We love the character of inland red cedar, but we wanted the grain to pop just a little more and the wood to be slightly darker in color. We also needed to protect the wood against the weather, since both of these projects would be outdoors and exposed.
Since we knew that oil-based finishes would be more resistant, durable, and darker, we mainly focused our tests on them.
Below are pictures of the two projects using tongue and groove cedar:

Porch ceiling covered with Kentucky Lumber’s Cedar T&G

Shutters built from Kentucky Lumber’s tongue and groove inland cedar
Finishes and Stains Used in Tests:
We used 8 different finishes and 2 different stain colors in our tests. Below are those stains and finishes:
Finishes:
Minwax Water Modified Oil Based Polyurethane
Minwax Oil Based Polyurethane
Minwax Helmsman Spar Urethane
Minwax Tung Oil Finish
Zinsser Clear Shellac
Zinsser Amber Shellac
Honey Teak from Cabot Australian Timber Oil
Valspar Stain & Seal Deck Stain
Stains:
Minwax Early American Stain
Minwax Natural Stain
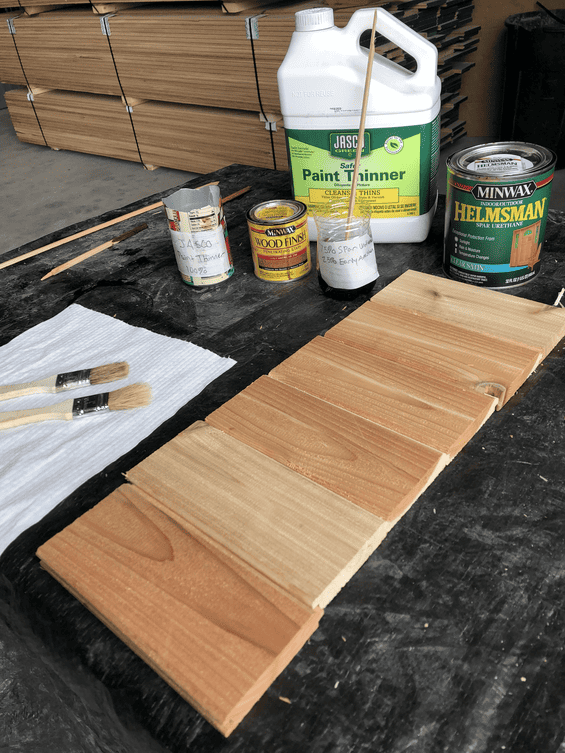
Here are the results of each stain and finish:
Finishes:
Minwax Oil Based Polyurethane, Minwax Helmsman Spar Urethane, Minwax Water Modified Oil Based Polyurethane, and Minwax Tung Oil Finish on bottom sample

Zinser Clear Shellac

Zinser Amber Shellac

Honey Teak from Cabot Austrailian Timber Oil

Valspar Stain & Seal Deck Stain
Stains:

Minwax Early American Stain

Minwax Natural Stain
Surprisingly, out of all the Minwax-brand sealers that were tested, only the Tung Oil changed the color, and it was only by a very small degree. The Spar Urethane, Water Mod Urethane, and Oil-based Poly were indiscernible from each other in color. All four highlighted the grain, but we still couldn’t get the color that we wanted. The Cabot Timber oil, cedar-colored deck stain, and Amber shellac turned the wood too yellow and covered up the grain. The clear shellac, like the Minwax products, did not change the color at all, but really made the grain “pop”.
We quickly realized that we would need to find a way to incorporate a stain in order to get the color we wanted. First, I tried the Natural stain, but it didn’t bring out the browns or reds that we were looking for. Next, I tried Early American, but it was too dark. After doing some thinking, I decided to try mixing our favorite clear coat (Helmsman Spar) with the Early American stain.
LOOKING FOR EASTERN RED CEDAR TONGUE AND GROOVE? CLICK HERE.
Quick Tip:
One trick I found that really helps the stain absorb evenly into the wood was to brush a thin coat of paint thinner (mineral spirits would work well too) onto the boards and let it dry for about 2 minutes before applying the stain/sealer mixture. Doing so causes the grain to open up slightly, allowing the stain to penetrate the surface easier. -Evan Hollingsworth
First, we tried mixing 90% Minwax Helmsman Spar Urethane with 10% Minwax Early American Stain. Next, we tried a 50/50 ratio, but both of them were too dark.

10% Early American with 90% Spar Urethane

50% Early American with 50% Spar Urethane on Cedar T&G
For our third option, we used a 25% Early American with 75% Spar Urethane. However, we came across the same problem as before… it was still too dark!

25% Early American with 75% Spar Urethane on T&G Cedar
Finally, we mixed 10% stain with 90% Spar. That was the winner! After our sample pieces dried, we went back and applied a second coat of Spar urethane to further protect the wood… and boy did it shine!

10% Early American with 90% Spar Urethane on Cedar

10% Early American with 90% Spar Urethane + 1 coat 100% Spar Urethane on Inland Cedar T&G
Once we arrived at a finish that fit the look that we were after, we mixed a pint of the stain and sealer solution and set to work trying it out on a few of the shutters.


Here’s how they turned out:


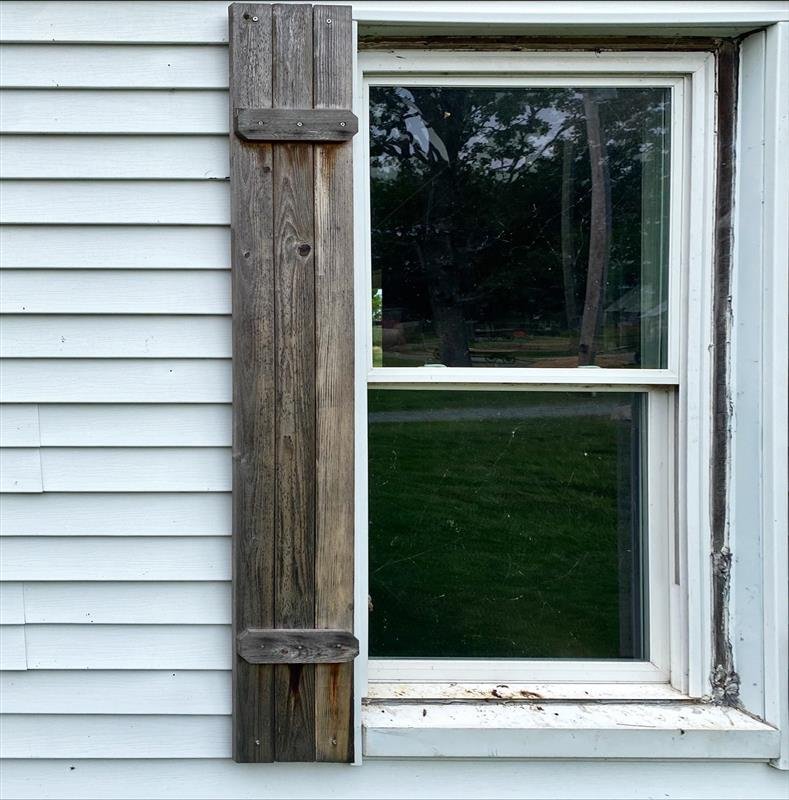
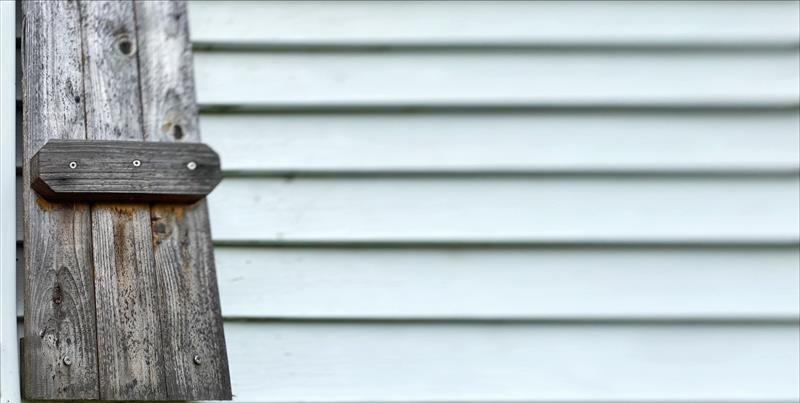
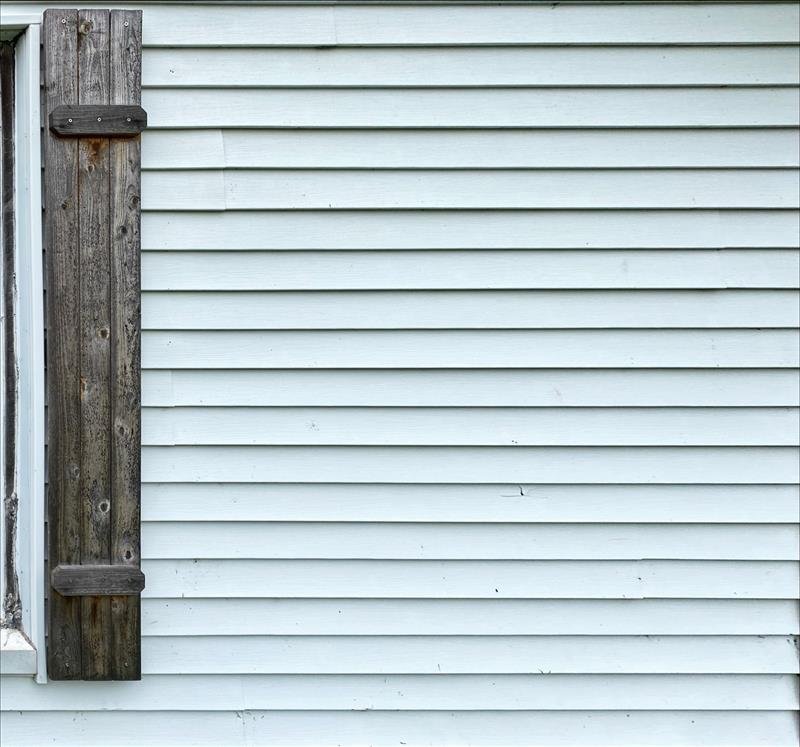
Update 2023:
After 3 years, we’ve discovered some very useful things about finishing cedar and want to share these with you! Check out how the shutters that we finished in 2020 have aged since then. Unfortunately, they have become very gray and textured.
We’ve learned since 2020 that mixing stain directly with a protective finish and applying it to wood is NOT a good idea. The finish prevents the stain from absorbing into the wood as it is supposed to, and the stain prevents the finish from properly adhering to the surface.
The reason?
Well, the UV light rays in sunlight interact with chemicals called “tannins”, which changes the color of the wood over time! This is called ambering the wood. We wrote a blog post specifically about this process in our knotty pine shiplap here.
Cedar will turn gray over time, and the more sunlight it is exposed to, the faster it will turn. This is why the cedar porch ceiling that we finished is not as discolored as the shutters on the side of the house.
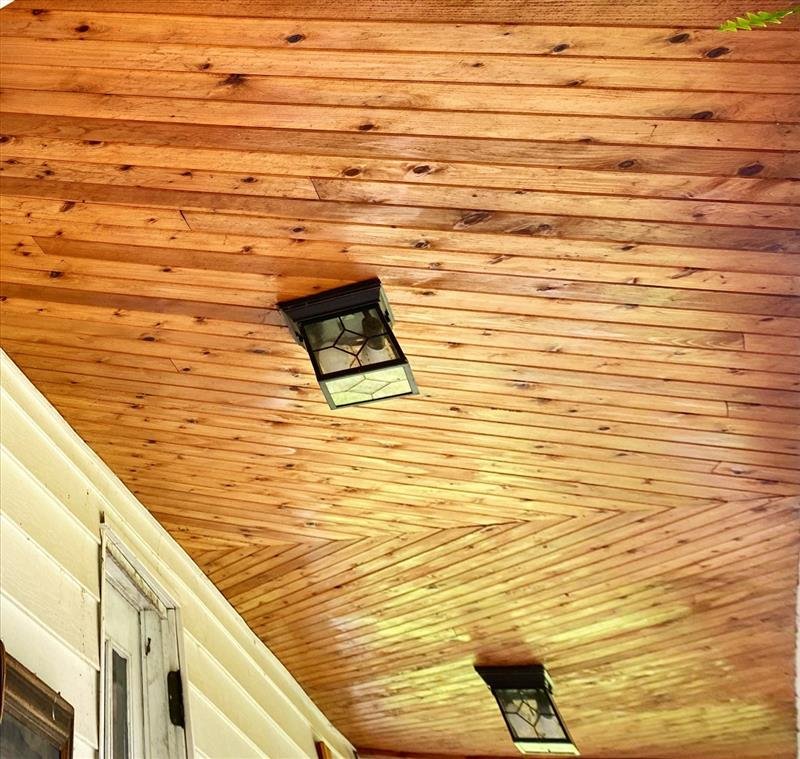
The cedar porch ceiling that was finished in 2020, picture taken in 2023.
The ceiling will eventually become more gray with time, but the shutters are definitely already at that point. To fix this, we plan to remove and disassemble the shutters, sand the finish and the weathered gray surface off, and get back to bare wood. The next step is to treat the wood with a pre-stain wood conditioner. After this, we can stain the boards again using *only* the Early American stain by Minwax. To prevent this from becoming too dark on the surface, all we had to do was let the stain sit for a very short amount of time before we wiped it back off. We anticipated only letting it sit for 20-30 seconds. It’s actually a lot simpler than we thought 3 years ago!
Once the stain has fully dried, we will go back with 2 coats of the same Minwax Helmsman Spar Urethane, or if we really want to step up our game further, we can do this by using several coats of a quality UV-inhibiting outdoor finish like Flood’s CWF-UV5.
One of the really neat things about staining your lumber for outdoor applications is that most oil-based stains have color pigments in them that can directly counter the effects of UV ambering in the wood. These solid pigment particles prevent the sun from passing through, so the wood should not change color once the stain is applied! The darker or heavier the stain, the greater the effect. If you follow this up with a good protective finish, you can get a very consistent and stable result that should only need recoated with new finish every 5-8 years! Alternatively, you can use a 2-in-1 product from companies like Valspar, Olympic, Behr, or ReadySeal
And that’s it! If you liked the post, leave a comment below telling us what your favorite tip was and how you plan to use it on your own project! Also feel free to ask any questions you might have!
Looking for Eastern Red Cedar tongue and groove? Fill out the form below and we will be happy to help you!